When research* tells us our screen-time averages around 10 hours a day, is it a wonder that neck and shoulder pain is the most common ailment people are dealing with today?
Many other factors contribute to neck pain, and it doesn’t take long for the pain to spread to other areas of the body, debilitating us into further stress and inconvenience.
80% of our nerves are in the neck, so it’s not surprising we feel a lot of tension when our neck goes out. The nerves that exit the spinal column in our necks are some of the most important nerve endings in the entire body. So we must take extra care to maintain a healthy and strong neck.
If you are suffering from neck pain or are simply looking for ways to strengthen your neck for yoga, you’ve landed in the right place.
Does yoga help with neck pain?
Yoga for neck pain relief is not only a great way to alleviate neck pain. It can also remedy the damages caused as well as prevent future injuries. Using the yoga poses I’m about to share, you can learn to release most kinds of neck and shoulder tension through consistent and mindful practice.
How do you strengthen your neck?
It’s essential to have a basic understanding of what’s happening in the neck when we’re in pain. Not only will this help us explain what’s causing it, but it’ll also teach us what we need to do to remedy it. We can stretch our muscles all day long, but there’s much more we can do to support and encourage a healthy and stable neck. Here are three things you should know about remedying a stiff neck.
If you have a stiff neck, one of the most important things you can do to remedy it is to restore the curve of the neck. The second thing you can do is get the neck muscles strong. The third thing we can do is relieve the pressure on the nervous system in the entire cervical spine area.
What simple exercise helps neck pain?
Now that you have a basic understanding of what we need to work on, it’s time to begin yoga poses for neck pain. All yoga poses for neck pain relief you’ll see here will work on one or more of the above. You’ll need a yoga mat, plenty of blankets or cushions, a strap or resistance band, and you’re good to go.
Yoga for Neck Pain: Best Poses for Neck Pain Relief
Read on to find out the best yoga poses for neck pain, neck tension, and pain relief. If you prefer to follow along on video, click here.
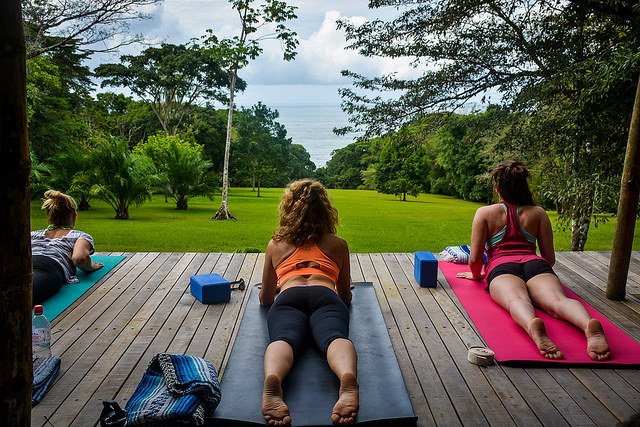
1. Sphinx pose
This pose may feel a little strange if you’re not used to shortening your lower back like this. You may feel some sensations and feel inclined to over-arch your back slightly. Ease into this pose and breathe into it. It’s important to intentionally send breath and oxygen to the muscles so that you can feel oxygen touching all the vertebrae in your lower back. Intentional breathing also provides energy to muscles which will help loosen and relax them.
- Lay on your stomach, with the tops of your feet flat on the floor.
- With your palms by your shoulders, gently lift your torso, so your arms are at a 90-degree angle.
- Take about 5-8 deep long breaths.
- To come out of the pose, lower your head and rest your ear on the floor. Release your arms by your side for a few breaths.
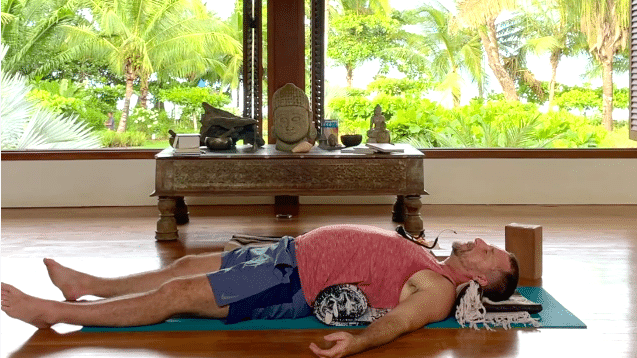
2. Spinal Molding
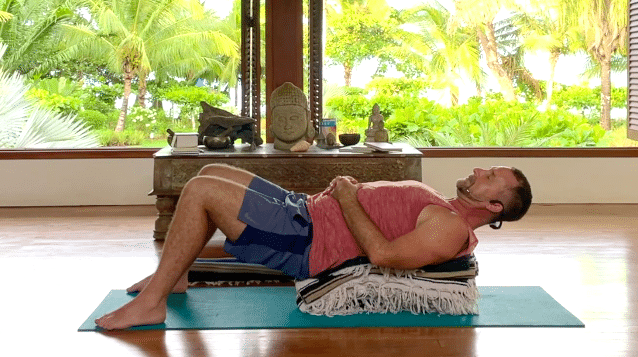
Spinal molding is excellent for rewiring your nervous system. You’re probably used to a slight slouch forward if you are in pain right now. Spinal molding will start to rewire the nervous system to sit up straight naturally and will relieve tension and pressure in your neck. The prescription for this pose is about 18 minutes. You can do this while you do Shavasanaa and the idea with this pose is to relax. Incorporate relaxation techniques such as body scan meditation or 61 points.
- Roll two sets of yoga blankets neatly and tight, one for under your lumbar spine and another of lesser height for the back of your neck.
- Line up your blankets to sit under your lumbar spine and your neck.
- Bring your buttocks up against the larger roll and lower gently. You may need to readjust the height, so it’s more comfortable.
- Feel the fall and rising of your navel center.
- To come out of the pose, inhale and exhale through the nose. Bend one knee, then the other, and gently roll over to your side (what we call pillow talk pose.) Take a few more breaths and slowly come up.
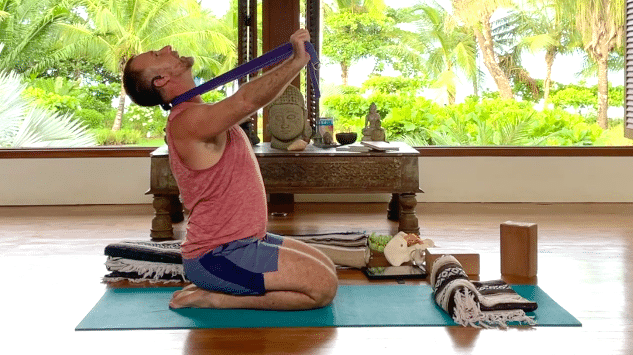
3. Neck stretch with strap
Using a yoga strap is a great stretching technique for any neck pain.
- Sit on your knees, so your lumber is in extension. If you want to sit cross-legged, you can. Just make sure you lengthen from the spine.
- Put your strap just above the vertebrae that stick out at the bottom of your neck. Please make sure you don’t place the strap on top.
- Hold either side of the strap with your hands and extend
- Pull gently with your hands and let your head fall back gently. Pull with your head, not your neck.
- Make sure there’s a curve in the lumbar spine.
- Inhale as you lower your head and exhale back to neutral.
- Repeat this 5-6 times.
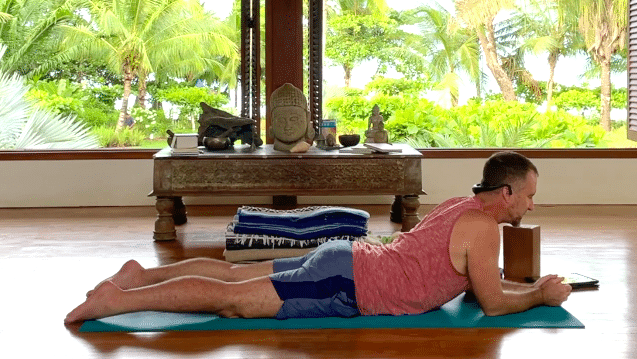
4. Fall back
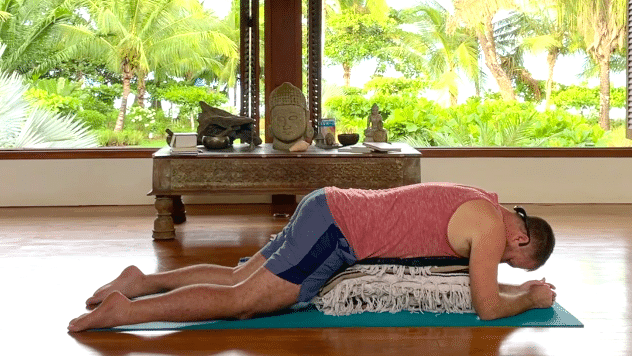
For this series of movements, we will create a table with yoga blocks and yoga blankets. If you have a massage table or a bench press, you can use that too.
We shorten the rotator muscles of the neck by turning the neck to the left and right. By lifting the head up and down, we shorten the extensor muscles. We come into extension through shortening and rotation on each side through these movements.
Forward and backward:
- Place a layer of yoga blocks plus 3-4 yoga blankets or even a hard cushion on top.
- Lay your chest on top of the blanket with both forearms on the floor, palms facing each other.
- Slowly, and without too much exertion, lift the head up as you inhale.
- Then gently let the head drop forward and exhale
- Repeat 5-6 times.
Your range of motion will increase after each head movement, allowing you to lift higher each time. It’s better to stay controlled until you feel comfortable going further, do not exert your head movements beyond your capacity, and stay with your breath.
Always remember to lift your head and not your chest. For this pose to relieve neck pain, it needs to work on your cervical (neck) extension, not the thoracic (spinal) extension. Work within your own capacity and allow your chest to relax. Even if you don’t go to your full capacity, you are still strengthening your muscles here.
Left and right:
After moving your head up and down, it’s time to work on left and right. The next time you drop your head.
- On an inhale, lift your head as high as you can, just as before
- Turn your head to the right.
- Hold for a few breaths and come back to neutral on the exhale.
- Repeat 5-6 times on either side.
5. Lay sideways
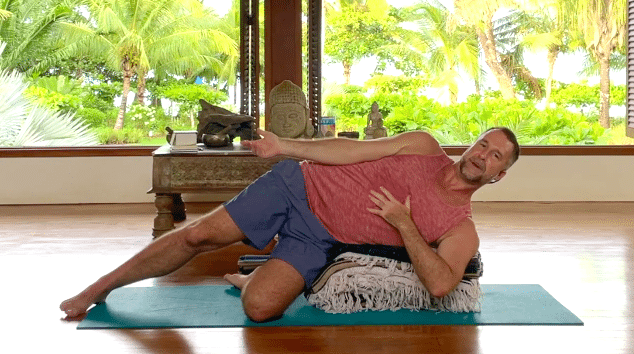
Use the same makeshift table or a bench if you have it.
- Lay sideways on your left side with your head hanging off the end.
- Rest your right arm along your torso. Lift your palm to face up and slowly raise it a few inches away from your body.
- Then slowly start to raise your head so your ear meets your right shoulder.
- Hold for 3-5 seconds, then slowly start to come down. Allow your head to come all the way over to the side slowly.
- Repeat 5-6 times.
You might notice some popping or tissues releasing. Sometimes the vertebrae come into alignment with this movement. Don’t try to force anything here. Just observe and breathe.
Repeat on the other side.
Turn to your back and rest your entire spine on your bench this time.
- Bring your head up halfway.
- Turn your head a little to the right, at 45 degrees
- Then lift your head up again for another 45 degrees.
- Hold for 3-5 seconds, then relax your head down. Take extra care not to hang your head if you are experiencing a lot of neck pain.
- Repeat this 5-6 times.
- Bring your chin to your chest, and turn your head all the way to the right.
- Bring your head back to neutral
- Repeat 5-6 times
6. Superman variations
This next series is a strengthening exercise to support the shoulder blades and the entire back muscles. The previous poses isolated the neck muscles, and now we’ll work on the muscles that support the neck.
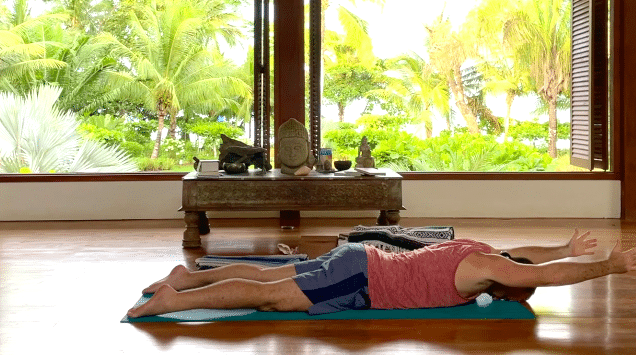
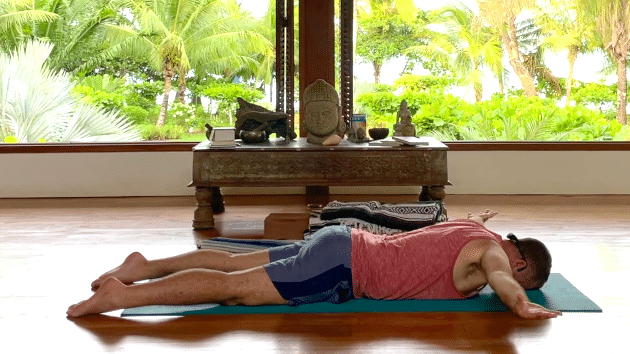
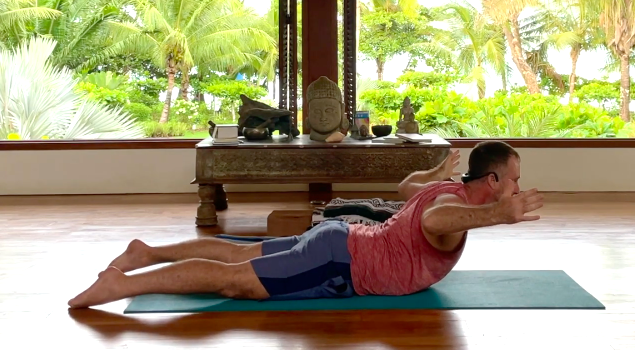
Superman
- Lay face down, with the top of your feet facing down
- Rest your forehead on the floor and reach your arms in front of you.
- Slowly lift both arms at the same time
- Hold for 3-5 seconds, and relax back to neutral.
Naturally, your entire body may tense to support your lifted arms. If so, take a moment to relax your bottom, legs, and everything else before relaxing your arms back to neutral.
Reverse superman
- Bring your arms to the side like a T.
- Do an inner rotation of the arms until your palms are facing up.
- Shrug your shoulders up to your ears gently, and lift the arms.
- Hold for 3-5 seconds and repeat 5-6 times.
Single-arm superman
- Bring your hands behind your back on your sacrum.
- On an inhale, lift your chest and swing your right arm forward
- Lift your chest as high as you can and hold for 2-3 seconds
- Bring your right arm back while turning your right ear to the floor as you exhale.
- Repeat at least 2-3 times
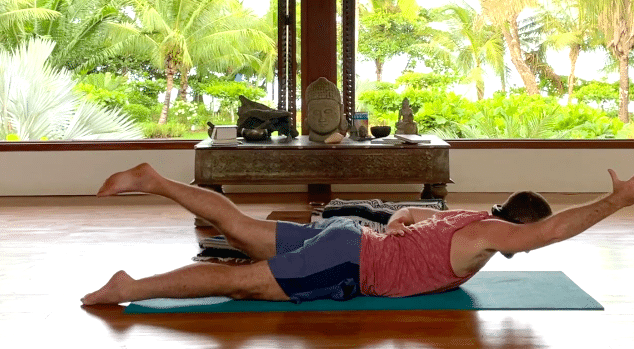
Sunbird superman
- After a few rounds of single-arm superman, see if you can lift both your right arm and your left leg simultaneously. This would look very similar to the sunbird yoga pose.
- Lift as high as you can for 3-5 seconds, then lower at the same time.
- Repeat this on the other side, lifting your left arm and your right leg.
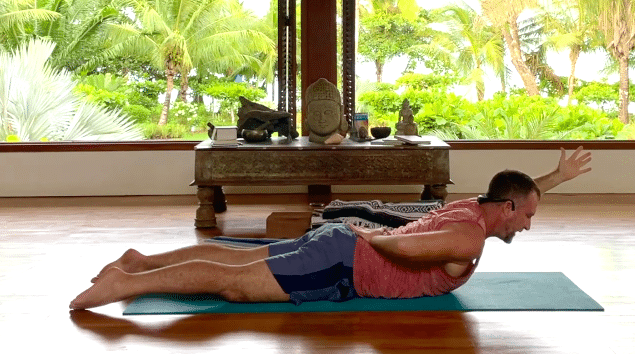
Bent arm superman
Isolate your lower back muscles as much as you can in this next pose. That means not squeezing your glutes at all. If you notice other body parts tensing and contracting, your body is compensating, and you aren’t using your back muscles. Go slow and do not exceed your capacity here.
- Laying face down on the ground, swing both arms forward at 45 degrees
- On an inhale, lift the chest as high as you can while lifting the arms
- Bring your elbows to the sides of your chest and squeeze your shoulder blades in.
- Hold for 3-5 seconds.
- Release your arms by crossing them in front of you. Rest your head on the back of your palms.
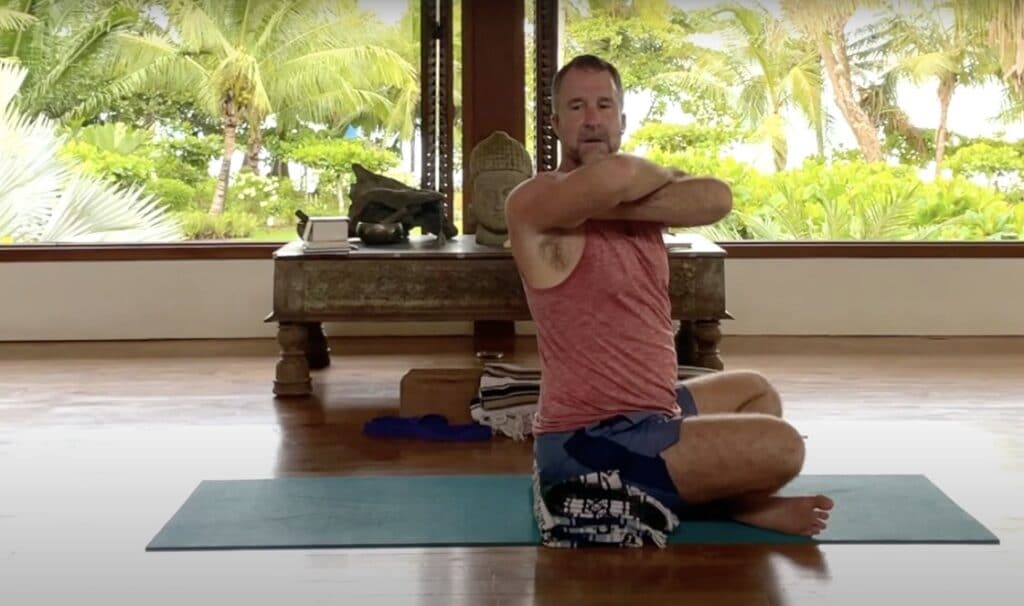
7. A Yogi Aaron favorite | Yoga Spinal Twist
- Sit in a crossed leg position with your hips higher than your knees (sit on a high blanket). Ensure your lumbar spine is arched as naturally as possible
- Bring opposite hands to opposite shoulders, and lift to chin height..
- Slowly move your torso to the right as much as you can.
- Start to move your head even further to the right as well.
- Stay there for a few breaths.
- Keeping everything below your shoulders in the same position, move your head slowly to the left.
- Return your head to the right and twist a little more,
- Come back to neutral.
- Relax your arms on your lap after each round.
- Repeat on the same side 6 times.
To repeat on your left side, oppositely recross your arms, and repeat turning your torso to the left and moving your head slowly to the right.
Once you’ve completed both sides, you’ve reached the end of the yoga poses for neck pain relief! It’s time to get into savasana.
These poses are gentle enough to do every day until your neck pain subsides. They’re also great additions to your yoga practice as preventative and strengthening methods for a healthy, stable, and strong neck.
Book/Inquire Now
Got pain? This will help you!
YOU DESERVE TO LIVE PAIN-FREE...
Receive 7 short, simple, and effective practices to alleviate knee, hip, low back, neck, shoulder pain, and more!
All you need is 5 minutes per lesson and it's FREE!
This revolutionary approach to yoga is new, and no one else is teaching this! Since I created Applied Yoga Anatomy + Muscle Activation™ and started teaching it consistently, I've witnessed students heal long-standing injuries, access yoga postures they never thought possible, and tell me over and over again how their body just feels better.
I hope you'll join me on this journey!
~Yogi Aaron
Is Yoga Teacher Training Right For Me?
We Created This FREE 5 Part Series So You Can Get All The Information To Make The Right Choice.
In this series, you will learn:
-
- Am I a candidate for yoga teacher training??
-
- What will I learn in a YTT?
-
- Do I need to have a perfect downward dog to attend YTT?
14-Day 200-Hour Yoga Teacher Training in Costa Rica
If you are looking for a 14-day 200 hour Yoga Teacher Training Costa Rica Immersion, you have landed in the right place. Join the next one!
300-Hour, 28-Day Yoga Teacher Training
Do You Feel Called To Something Greater?
This 300-Hour Yoga Teacher Training immersion training at Blue Osa will immerse you in yoga for one month.
You will have the specific transformational skills and yogic practices you need in order to connect with your higher purpose.
And more! You will be able to offer these transformative skills to others!

