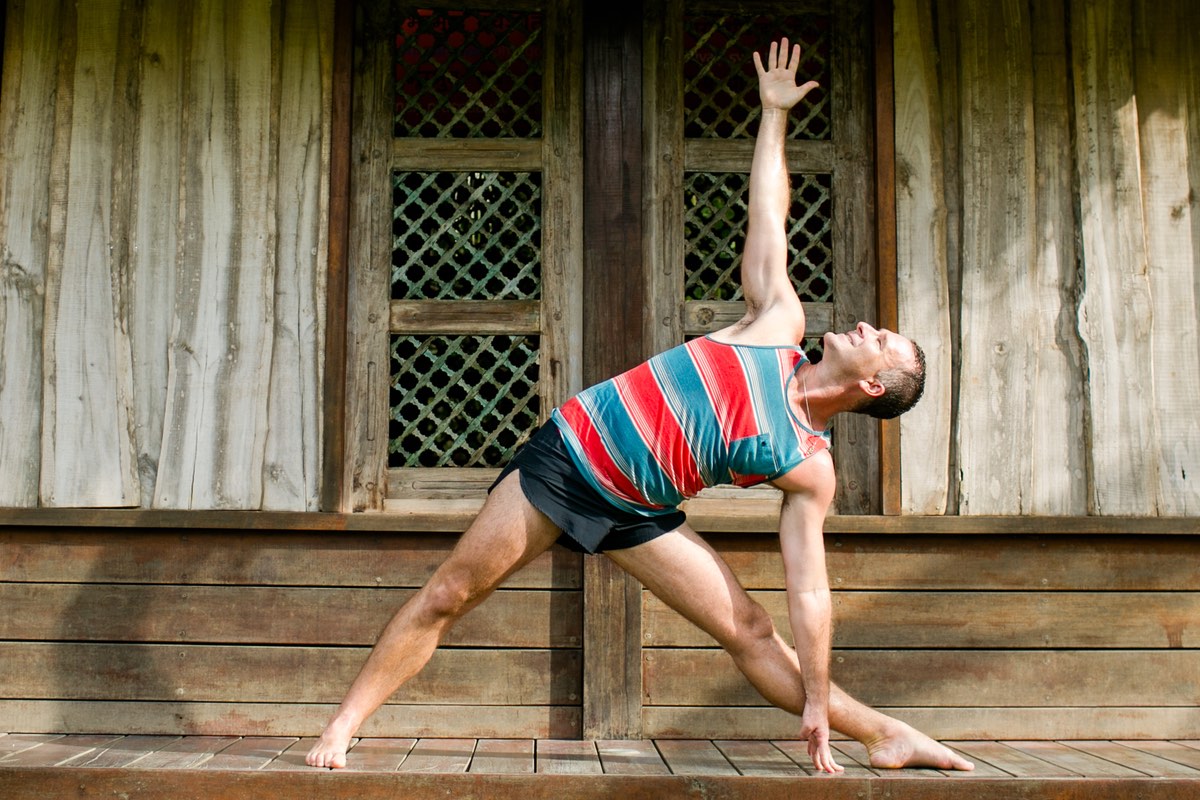
Triangle Pose is a key foundational posture for any yoga practice. Not only does it offer an array of fantastic physical benefits, but Triangle Pose is also a common posture used to move in and out of other more advanced yoga postures.
No matter how advanced your practice or yoga teaching experience, it’s sometimes critical to return to the basics to check in on alignment cues and how we are maximizing our experience in each and every posture.
And with these fun and unique variations on teaching and practicing Triangle Pose, you’re guaranteed to step onto your mat with a fresh energy and outlook on this accessible pose.
Benefits of Triangle Pose (Trikonasana)
Physical Benefits
If you’re looking for a powerful stretching and strengthening posture that supports expansion throughout the entire body, then look no further than Trikonasana. As part of the lateral series, Triangle Pose helps to increase the flexibility of the spine from side to side and open up the side body by stretching the fascia surrounding the lungs. It also works to strengthen your ankles, legs, back, shoulders and core muscles and lengthen through the oft-neglected side bodies and hips. Trikonasana can also help to improve digestion while opening through the heart and chest.
Internal Benefits
Our hips are one of the key places where we store stress and emotions that are no longer serving us. As you continue to practice, open and lengthen in Triangle Pose, your body begins to release these anxieties and unprocessed emotions. Yogi Aaron also explains in the video below, how Trikonasana helps us get our minds out of our body so we can feel bigger, more expansive and move into new possibilities.
How To Practice Triangle Pose (Trikonasana)
Watch Yogi Aaron guide you through the proper alignment of Triangle Pose in this short video.
Step One
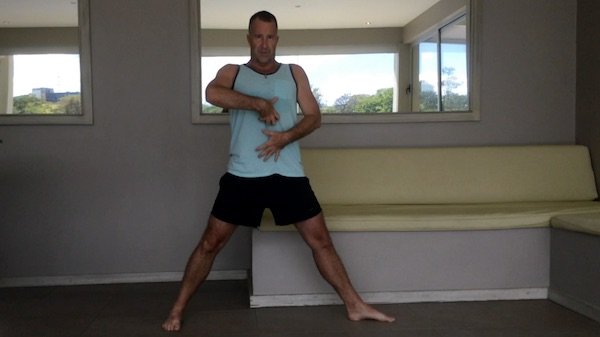
Begin by standing lengthwise on the mat with your feet about four feet apart. Point your right foot towards the front of your mat. Check the alignment of your feet so that the front heel is in line with the back heel. Turn the back foot (left foot) in about 15 degrees if it’s more comfortable for you. You made need to slightly adjust the distance between the feet as you practice the pose.
Step Two
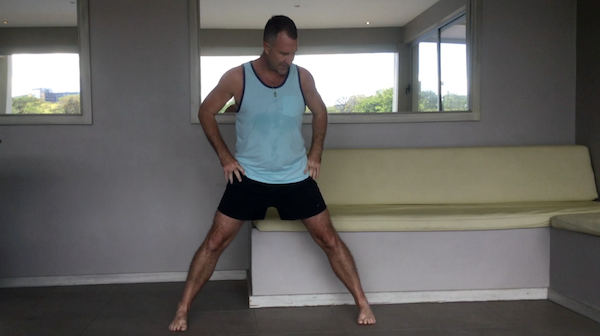
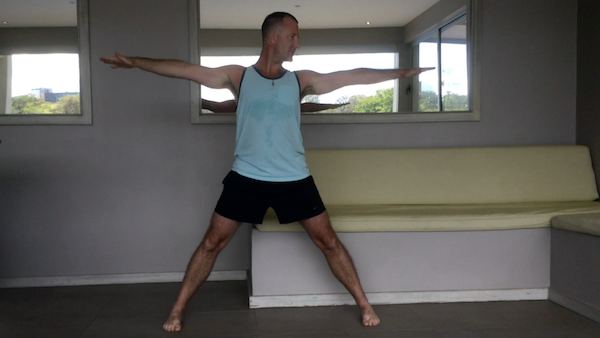
Inhale the arms up so they are parallel with the ground. Exhale and get rooted to the ground beneath you, engaging the thighs and lifting the kneecaps. Expand throughout the arms, actively stretching through the fingertips. Feel yourself growing taller through the crown of the head.
Step Three
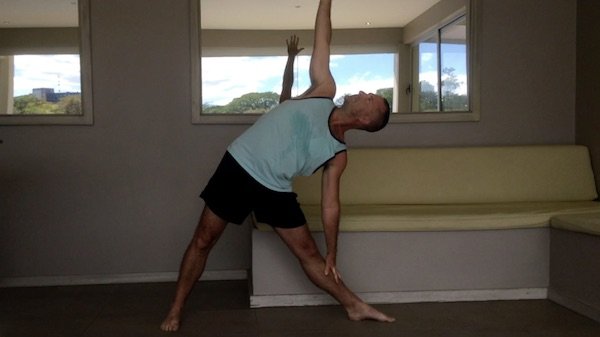
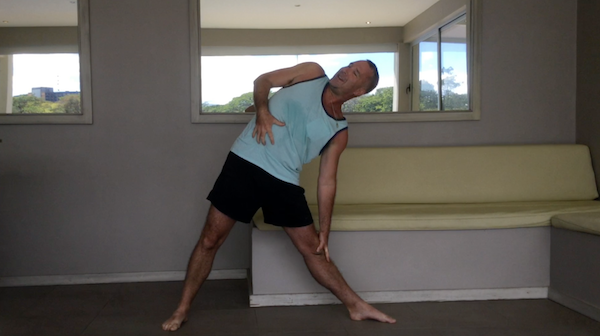
On the next exhale, engage the core and reach forward with the right fingertips as far as possible. Keeping this length through the sides of the body, begin to hinge at the hips, dropping the right fingertips to your thigh, shin, a block beside the foot, or the ground. Remember not to let your hip stick out, but to focus on squeezing your hips together toward the midline to keep your alignment and length through the core. Your left arm and fingertips will reach up, powerfully stretching towards the sky.
Step Four
As you continue to breathe in the posture, check in with the upper torso. Ideally it is in one plane, with the pelvis and torso over the legs. Focus on twisting your torso and your heart open and upward. Try to avoid sticking out the buttocks or collapsing in the front hip. If you find alignment challenging, give yourself more height by putting the front hand unto a chair or block. Your head can glance up at the top hand if this creates no tension.
Step Five
Continue breathing in the posture as long as feels comfortable. When you’re ready to come out, engage the core and push down into the back foot. Fluidly come back up to a standing position with arms parallel to the ground. Windmill the arms down to the ground to find Downward Dog. Step the left leg forward to move into Triangle Pose on the left side.
[et_bloom_inline optin_id=”optin_16″]
Modifications For Triangle Pose (Trikonasana)
To fully experience the benefits of the posture, we want to continue to stretch and strengthen through the body. Don’t worry if your front hand does not reach the ground in the beginning—with time it will. While you practice the posture, always use props as necessary to encourage proper alignment. A chair or block are always fantastic places to start.
As in any pose, you should not feel any pain in the hips, lower back or joints while practicing Triangle Pose. You can always slightly bend the front knee.
A great way to slowly expand into the posture is to practice in a vinyasa style. In this variation, you will move continuously as you breathe, moving into the posture with each exhale and rising with each inhale. You may find that with each subsequent breath you are able to move slightly deeper into the pose.
You can also make Triangle Pose more advanced by moving into the pose and lifting the arms over your head towards the front of your mat. This is a great way to engage and strengthen the core and obliques.
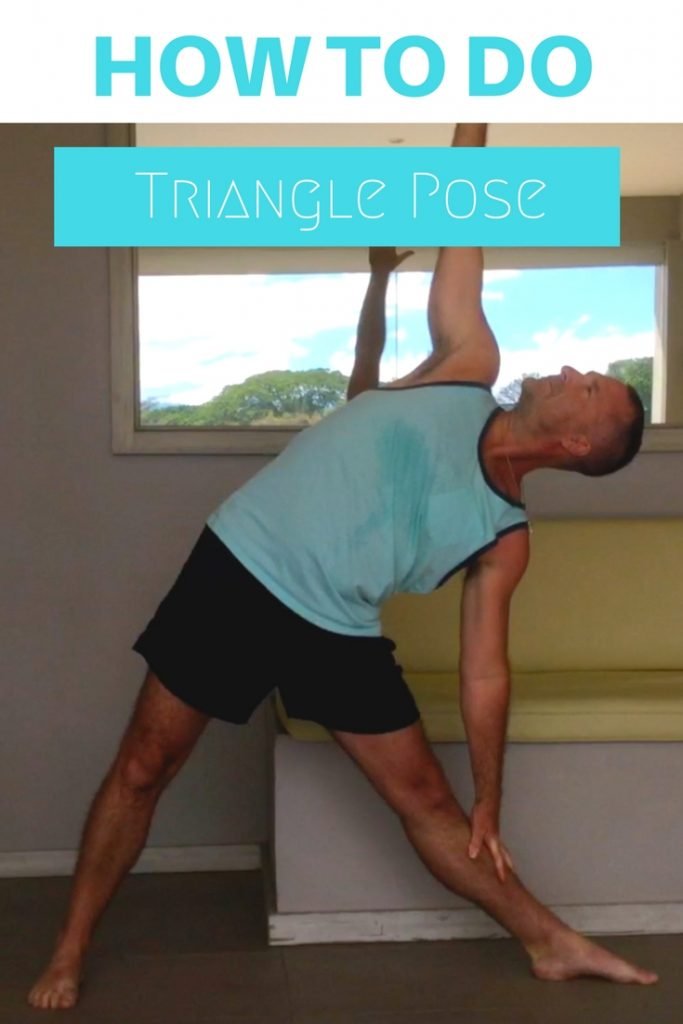
Pin It For Later!
About the author:

Casey Siemasko is a content marketing consultant, travel blogger, and wandering yogi. An entrepreneur at heart, she is the co-founder of the award-winning travel blog A Cruising Couple. Besides yoga and travel, she enjoys wine tastings, being outdoors and taking on new hobbies. Follow Casey on LinkedIn and Google+.
Follow Casey:


