+ Go On To Teach Yoga Poses
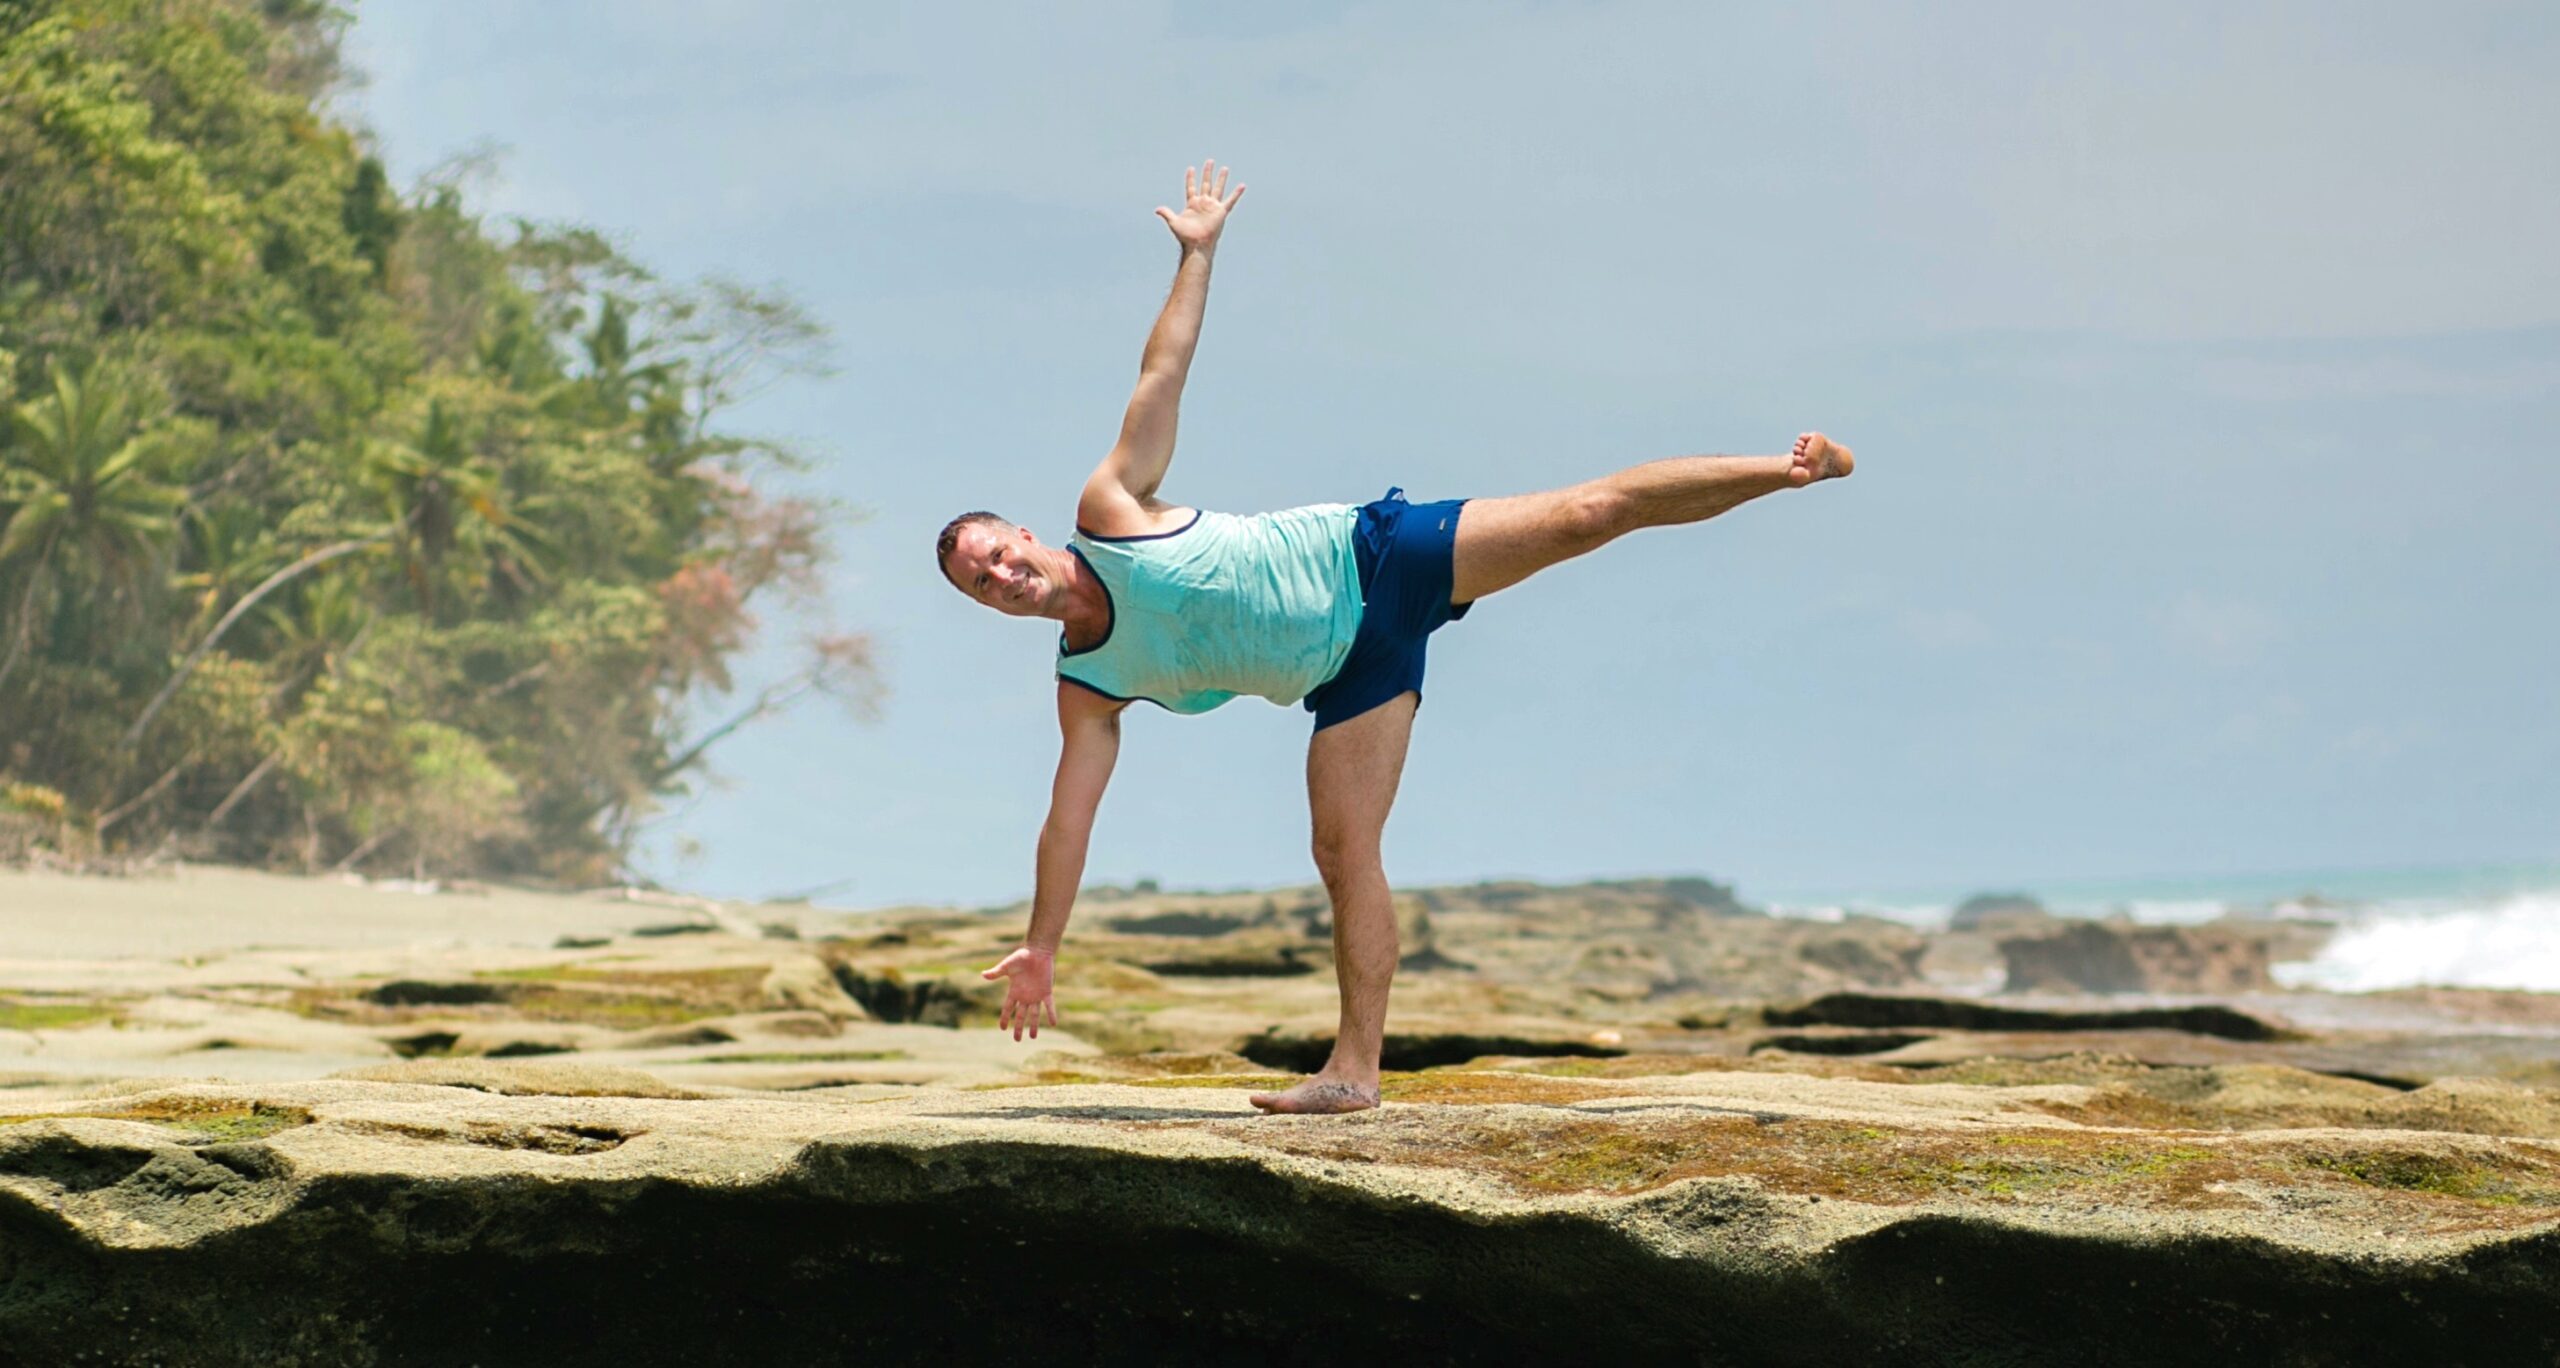
Half Moon Pose (Ardha Chandrasana) can be a particularly daunting yoga posture for both yoga students and yoga teachers alike. That’s in large part because Half Moon Pose is not only a balancing posture but also a powerful way to stretch and strengthen the entire body.
However, with the right alignment and modifications, Half Moon Pose is a posture that every student and teacher can incorporate into their yoga practice. Let’s dive in:
Benefits of Half Moon Pose (Ardha Chandrasana)
Before we explain how to move into Half Moon Pose, let’s first cover why it’s such a potent posture to practice.
Physical Benefits:
Like all balancing postures, Half Moon Pose is a fantastic way to strengthen the ankles, knees, and legs. This posture also strengthens the core and spine, opens the chests and shoulders, and—when practiced with proper alignment—can help to alleviate back pain.
Internal Benefits:
Half Moon Pose is a cooling posture, which means that it releases excess heat in the body while inviting in calming, soothing energy. It’s a great pose to reduce anxiety and relieve stress, while also improving digestion and balance.
How To Practice Half Moon Pose (Ardha Chandrasana)
Watch Yogi Aaron guide you through the proper alignment of Half Moon Pose in this short video.
Step One
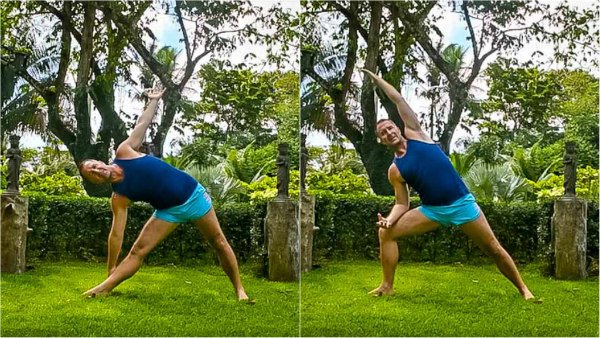
Begin in Triangle (Trikonasana) or side angle pose with the right leg in front, toes pointing straight ahead. Left foot is parallel with the front edge of your mat. Hands can rest on the hips.
From Triangle, begin to bend in the right knee. Take the right hand forward in front of the foot about 12 inches.
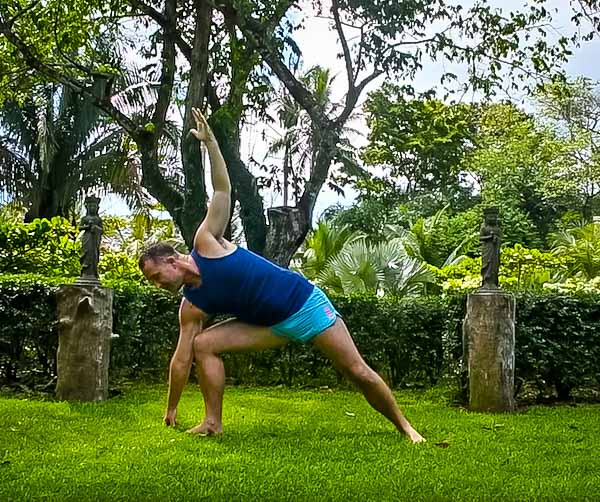
Pause here. Before continuing to move into the posture, take a moment to make sure that your hip bone rolling down and in towards your body and the right knee is not collapsing in, but instead tracking towards the pinky toe. Press down into the ball of the foot. As you continue moving into Half Moon Pose, check-in with the right foot and knee to ensure you keep this engagement and alignment.
Step Two
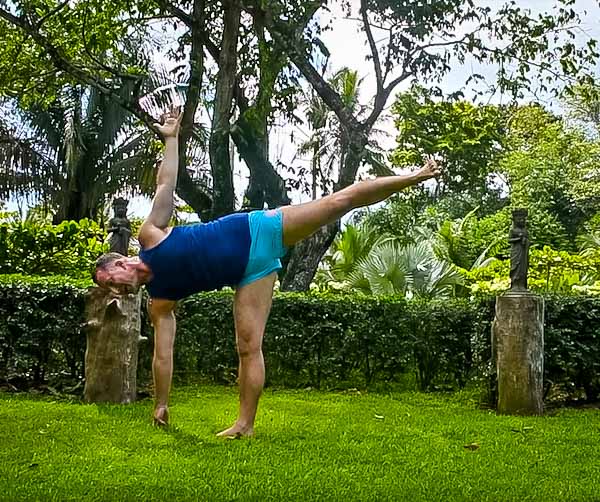
Reconnect with your breath. Inhale deeply. On the exhale, begin to straighten the right leg while simultaneously lifting the left leg up into the air. Eventually, the left leg will be parallel to the ground, but don’t worry if you’re groin and thighs are not open enough for this the first time you practice.
Keep the left foot flexed, with the toes pointing out the same direction you are facing. Activate the left leg by pushing into an imaginary wall. Check-in with the standing leg to ensure the knee is still tracking out and that your hips are still rolling down and in.
Step Three
Breathe into the back body. Begin to open up through the chest and the shoulders. The left hip will eventually stack on top of the right but move from the naval center to help you open and expand fully without destabilizing.
From here, if you feel strong and balanced, begin to extend the left fingertips up to the sky. Gaze can stay straight ahead or eventually move towards the sky as well.
Step Four
As you continue holding the posture, keep rooting strongly through the standing foot. With each inhale, draw energy up from the ground through the body to lengthen fully. With each exhale, expand and open through the heart and chest as you press the shoulder blades together.
Draw the floating left leg forward about an inch or two. Notice the increased awareness and sensitivity in the left glute and thigh.
As you continue to move deeper into the posture, try not to put too much weight into the right hand on the floor, but instead to feel light, energized, and free as the energy moves up and out of the top fingertips.
Step Five
Stay in the pose for up to a minute. When you’re ready to come out, gently float the left leg down to the ground to come back to Triangle (Trikonasana) or side angle pose. Windmill the arms down to the ground to find Downward Dog. Step the left leg forward to move into Half Moon Pose on the left side.
Always ensure the body is warmed up before practicing an intense posture such as Half Moon Pose. Release and rebalance the body with gentle forward folds and seated twists after you’re done playing in the pose.
Modifications For Half Moon Pose (Ardha Chandrasana)
Half Moon Pose is a challenging posture, but these modifications will help yogis of all levels experience the benefits of the pose:
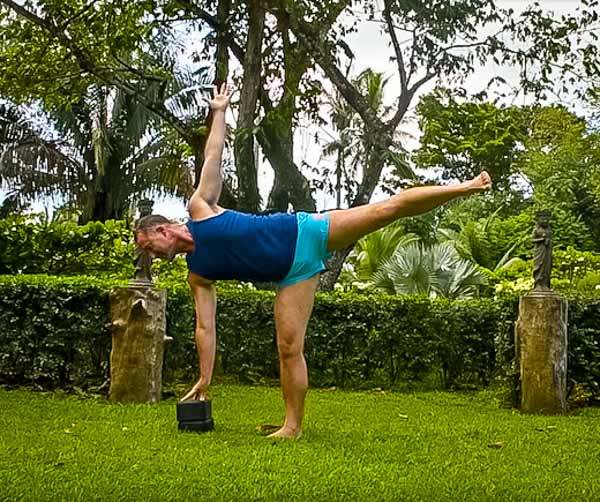
Half Moon With A Block
One of the most common modifications for Half Moon is to put a block or two under the front hand, essentially elevating the ground so you can open and expand more fully. You can use any level of the block that feels comfortable for you.
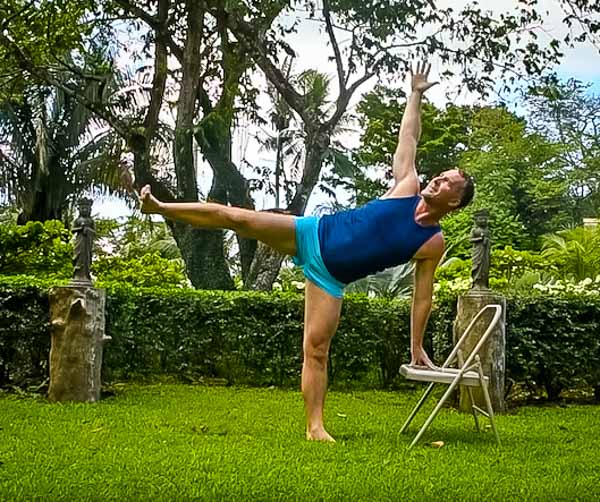
Half Moon With A Chair
Another wonderful way to practice proper alignment in Half Moon Pose is to practice the posture with a chair. Instead of a block, rest the front right hand on the seat of a chair. This will allow you to fine-tune the alignment of the posture while still receiving all the same energetic benefits of the pose. Try not to push too strongly into the chair, and eventually play with floating the hand closer to the ground or a block.
Half Moon With Back Against A Wall
This is a particularly good way to keep proper alignment while working on the balancing aspect of the posture.
Move into Half Moon following the steps above, but this time, push the left floating foot into a wall behind you. Keep the toes pointed out to open in the groin. Each breath, keep pushing into that back wall as you continue to open up through the chest, imagining a ray of energy traveling from the back foot through the spine and out of the skull.
Continue to use your block or chair under the front hand as well if you like. Hold here for a few breaths, and then try the posture without the wall to notice increased body awareness and stability.
Helpful Cues
If you’re teaching Half Moon Pose, here are a few cues that will help both you and your students:
-Keep the front knee pointing forward and tracking out toward the pinky toe
-Externally rotate the back thigh
-Squeeze the thighs towards the centerline
-Move from the core to engage the abdominal muscles and fully open through the chest and shoulders
-Breathe into the back body as you squeeze the shoulder blades together
-Spread the fingers and toes to invite space and freedom into the body


