When thinking about Downward Facing Dog in yoga, there are many different reactions depending on the student. There are those of us that grimace thinking about our hamstrings stretching or putting weight on our hands. There are the yogis that smile thinking of it as a resting posture – a light moment’s break in-between the “big stuff”. And there are those of us that avoid it because it involves our teacher getting a full on view of our bums! Of course, we are all subject to our personal preference and opinion on specific postures, and all of these reactions are common as well as perfectly acceptable. But what people do need to know is that Downward Facing Dog, when done correctly, can bring a massive amount of strength and stillness to your yoga practice.
Downward Facing Dog can be labeled as a forward bending pose, an extension pose, as well as a strengthening yoga pose. It is traditionally in most sequences. It is one of the poses in all sun salutation sequences as well as in most vinyasas. Downward Facing Dog can be a great transitioning pose but it is also a pose that if held properly can build strength and stillness in the body and in the mind.
Here is everything you need to know about practicing Downward Dog correctly so that you gain the benefits of this powerful pose both physically and mentally.
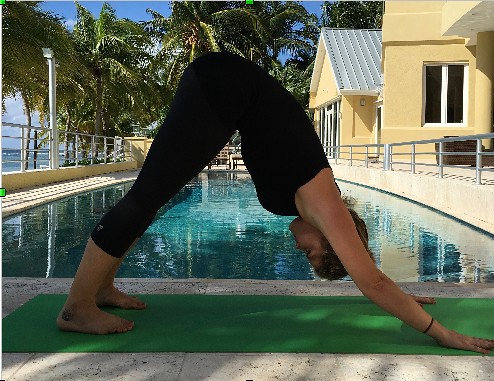
Adho Mukha Svanasana – Downward Dog Pose
Sanskrit:
(Ah-Doh Moo-Kah Shavah-Nahs-Anna)
Adho = Downward
Mukha = Face
Svan = Dog
Resemblance:
This pose resembles a dog stretching upon rising or a simple dog stretch throughout the day, with head and forelegs down and hind legs and tailbone up – hence the name, downward dog.
How To Do Downward Dog:
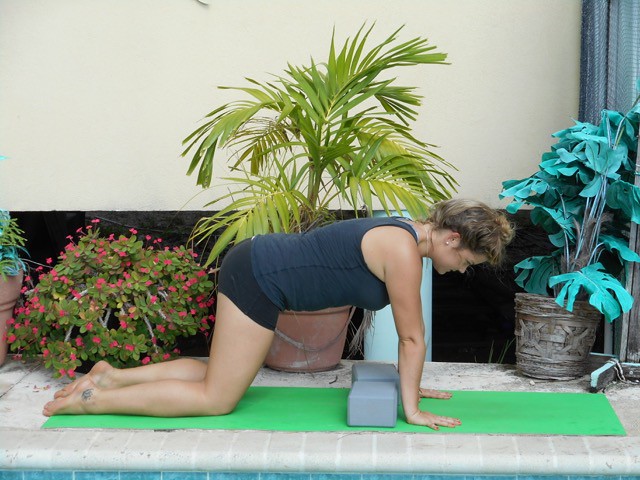
Start on the floor on your hands and knees (table top).
Knees should be directly below hips, and hands should be about or a little more than shoulder width apart and slightly forward.
Anchoring on pinky sides of hands, ground through your hands with the index finger pointing directly forward, making an ‘L’ shape with the thumb.
Anchoring on pinky sides of hands, ground through your hands with the index finger pointing directly forward, making an ‘L’ shape with the thumb.
Keeping the knees bent, curl your toes, press through the hands, and lift your hips up and push up and back. The knees can stay slightly bent here to get an extension in the spine. When the body gets more warmed up, with an engaged abdominal you can then gradually straighten the legs and lower the heels towards the floor.
Work on lowering your heels to the ground by lengthening your tailbone up and pressing the leg bones back.
Arms stay straight and you can rotate your forearms inward and upper arms are externally rotating to broaden the upper back and give more space for the shoulders. Roll and drop the shoulder blades down the spine.
Head is moving inwards towards the feet. Chest is leading towards the legs, gaze is softened and neck is relaxed. The head and neck should continue along the same line as the spine.
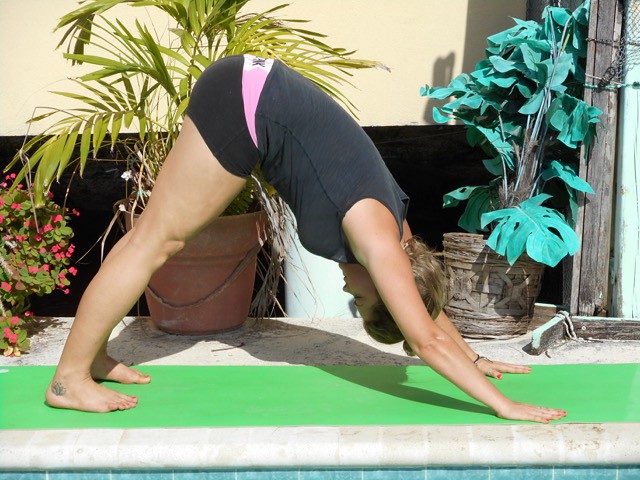
While In Down Dog, Remember To:
Press down evenly through all 10 fingers.
Relax your neck and soften your gaze.
Roll shoulders back and away from ears.
Chest is leading towards legs.
Hollow the armpits and rotate the upper arms externally so elbow crease faces your thumb.
Abdominal muscles are engaged and belly is drawn in towards the spine.
Lengthen your tailbone away (or as my teacher would say, “Lift your ski slopes up!”)
Pull legs/thighs back trying to draw the inner leg muscles up into the groin.
Heels extended away from toes and pulling towards your mat.
What If…
…..my hamstrings are tight?
You can place your heels onto a folded blanket or wedge.
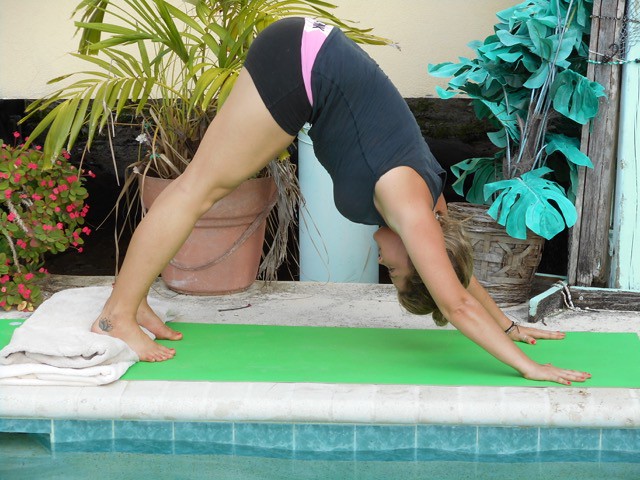
You can continue to bend your knees more while stretching and lengthening the spine.
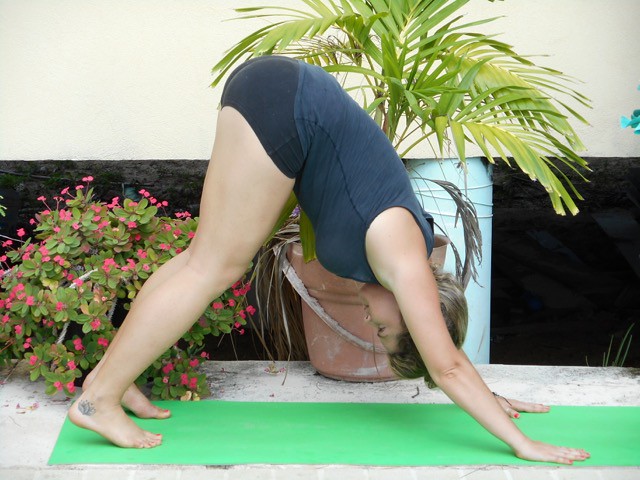
…..my wrists hurt?
You can shift some of the weight off your wrists by bending the knees and lifting hips further up and back. Try to shift the weight towards your legs, even if the knees need to keep bending.
Make sure all fingers and fingertips are engaged. This will assist in energizing your upper body. Your hands are engaged and rooted. This awareness will help take the weight off of the wrists.
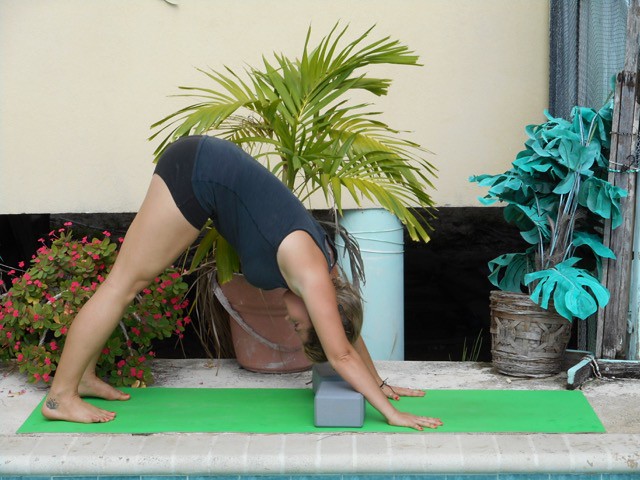
You can also place your hands on blocks to be lifted up higher, which helps take some of the weight off and assists you in getting the heels closer to the ground.
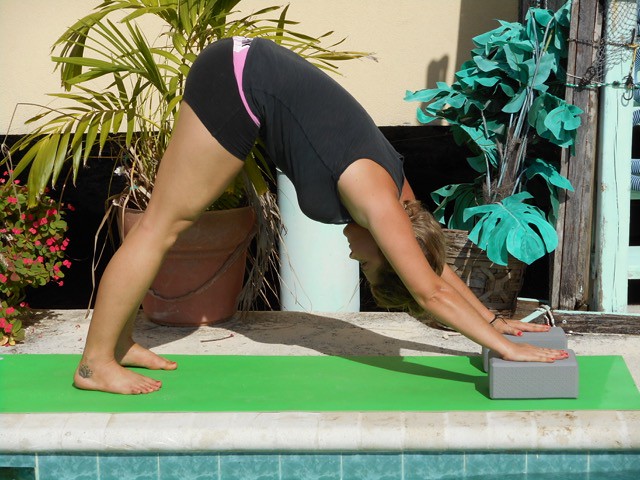
Prop Adjustments/Variations:
Get into tabletop position. Place block behind wrists. Hands can go on a blanket too.
This adjustment will help from collapsing in the shoulders.
You can also loop a strap around arms above the elbows. The strap should feel like it’s pressing the outer arms against the bones and tightening inward.
Placing a yoga block between the inner thighs in downward dog will help bring awareness to the inner rotation of the thighs. Hold onto the block with your thighs and internally rotate it towards the wall behind you.
Watch Out For:
Collapsing in the Shoulders
Downward dog is not meant to be backbend. Collapsing or hyperextending in the shoulders and elbows is a common alignment error that unfortunately has been carried on for years. Try to get a teacher to check your alignment in downward dog if you can’t tell if you are collapsing or not. If you can feel that you are doing a slight back bend, pull the bellybutton in toward the spine and lengthen out the lower back so it is in line with the shoulders, elbows, and wrists. Also, try to maintain the external rotation in the upper arms and remember to roll the shoulder blades back, this will stop the hyperextension in the elbows.
Chest Towards Floor
Super flexy people may have a habit of pushing the chest towards the floor. Remember that pushing the legs back, does not mean to push the chest down. Try to draw the rib cage in and also make an effort to maintain a flat back.
Walking Heels Towards Hands
Try to avoid walking your feet closer to your hands in order to get the heels to the ground. The hamstrings will strengthen over time and the flattening of the heels onto the floor will develop with your practice. Keeping alignment is important in order to get the benefits of downward dog, even if the knees are bent and heels are not on the floor yet.
Health Benefits:
Removes stress and fatigue (by calming the nervous system) and brings back energy to the body (by getting the blood flowing).
Builds strength in your wrists, arms, shoulders, legs, and ankles.
Deeply stretches your hamstrings, shoulders, calves, hands and spine.
Relieves pain and stiffness in the heels and arches.
Strengthens core.
Inversion Benefit: Although less strenuous that other inversions, downward dog gains all the same benefits. Practicing this posture can provide relief from headaches, sleep disorders, exhaustion, and mild depression.
Cautions:
Carpel Tunnel Syndrome
Late –Term Pregnancy
Headache – practice downward dog with your head rested on a block to relieve tension in the head and neck.
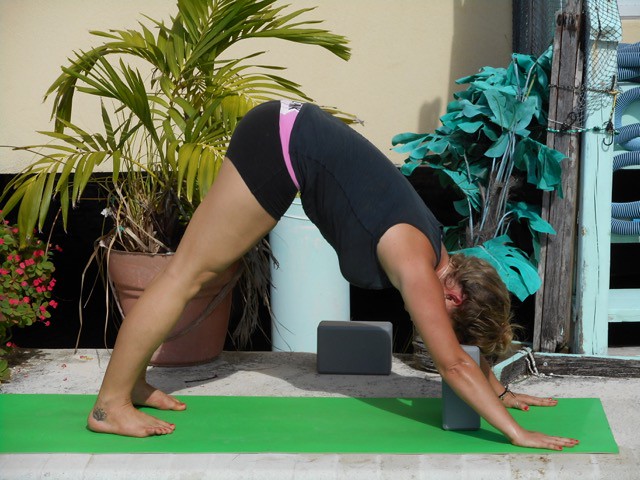
So after reading about downward dog, do you really know how to down dog? Have any questions or comments? Share them below!
About The Author
 Brooke first discovered her love for yoga 4 years ago while going to University in Halifax, Nova Scotia. She had practiced different styles from ashtanga, bikram and vinyasa flow before deciding to take her YTT at Blue Osa in 2014. The 30 day hatha-based yoga immersion completely transformed her life and yoga practice, in a way she never imagined. A dream came true, and she went back to Blue Osa in 2015 to assist with the YTT, and left there again with a brand new, fresh, completely inspired outlook on the world. Now living and working a day job in the Cayman Islands, Brooke hopes to one day pursue a career in yoga, but for now is enjoying life with her sister and dog on the beautiful beaches in the Caribbean! Follow her Instagram @barefootbrookeyoga.
“Yoga completely saved me. It was the only thing that made me happy and gave me confidence at a time in my life when I had neither. It helped me get my breathe back. It helped me get my life back. I am forever grateful for yoga.
Tags: inspiration, Stronger body, Yoga
Book/Inquire Now
Got pain? This will help you!
YOU DESERVE TO LIVE PAIN-FREE...
Receive 7 short, simple, and effective practices to alleviate knee, hip, low back, neck, shoulder pain, and more!
All you need is 5 minutes per lesson and it's FREE!
This revolutionary approach to yoga is new, and no one else is teaching this! Since I created Applied Yoga Anatomy + Muscle Activation™ and started teaching it consistently, I've witnessed students heal long-standing injuries, access yoga postures they never thought possible, and tell me over and over again how their body just feels better.
I hope you'll join me on this journey!
~Yogi Aaron
Is Yoga Teacher Training Right For Me?
We Created This FREE 5 Part Series So You Can Get All The Information To Make The Right Choice.
In this series, you will learn:
-
- Am I a candidate for yoga teacher training??
-
- What will I learn in a YTT?
-
- Do I need to have a perfect downward dog to attend YTT?
14-Day 200-Hour Yoga Teacher Training in Costa Rica
If you are looking for a 14-day 200 hour Yoga Teacher Training Costa Rica Immersion, you have landed in the right place. Join the next one!
300-Hour, 28-Day Yoga Teacher Training
Do You Feel Called To Something Greater?
This 300-Hour Yoga Teacher Training immersion training at Blue Osa will immerse you in yoga for one month.
You will have the specific transformational skills and yogic practices you need in order to connect with your higher purpose.
And more! You will be able to offer these transformative skills to others!


